
Seitan is one of my favorite vegan options. But it has to be done right––store bought seitan can prove particularly disappointing, although, I have found it to work well if ground up with lots and lots of other flavorings, such as this taquito recipe my friend shared with me quite a while ago.
Otherwise, though, I find your best bet is to make your own seitan. I used to always, always boil my seitan, and have this post with step-by-step directions on how to make seitan using this method. However, I've recently been won over by baked seitan, which is firmer and a bit easier to handle.
I think both methods have their place, for example, if you are going to bake your seitan in some way, such as in this recipe (apologies for the yellow pictures.... I am only an aspiring photographer!), I recommend using the boiled seitan recipe. That way your seitan has more moisture to begin with, and you can successfully bake it. If you try to bake seitan that was also prepared using the baking method, it dries out too much and becomes very tough. Baked seitan is better for sauteing or putting in soups since it remains very firm. I used this baked seitan in my Seitan Bulgogi (Korean BBQ) recipe a few months back.
The recipe below is a modified version of the seitan for Teriyaki Seitan Asada Tacos from Just the Food, which by the way I highly recommend because they are AMAZING. The changes I made to this recipe are that I've made it much bigger, because I don't like making seitan just for one recipe. My strategy is to make lots of seitan at once, that way I can use it in different recipes and don't have to make it as often.
Most of my recipes make 6 servings because my husband and I rely on leftovers––we've found 6 servings to be a good balance between having leftovers for two dinners and a lunch, without overloading our tiny kitchen. This way, we only have to cook 3-4 times a week, but we have a lot of variety to keep us interested and healthy. So, I've modified this recipe so that I get two weeks' worth of seitan (or 12 servings).
I also switched out the whole wheat for nutritional yeast (nooch) because I prefer my seitan to be a bit less "bready" and nooch provides protein and some B12. I also added a bit of olive oil because oil makes things taste better of course.
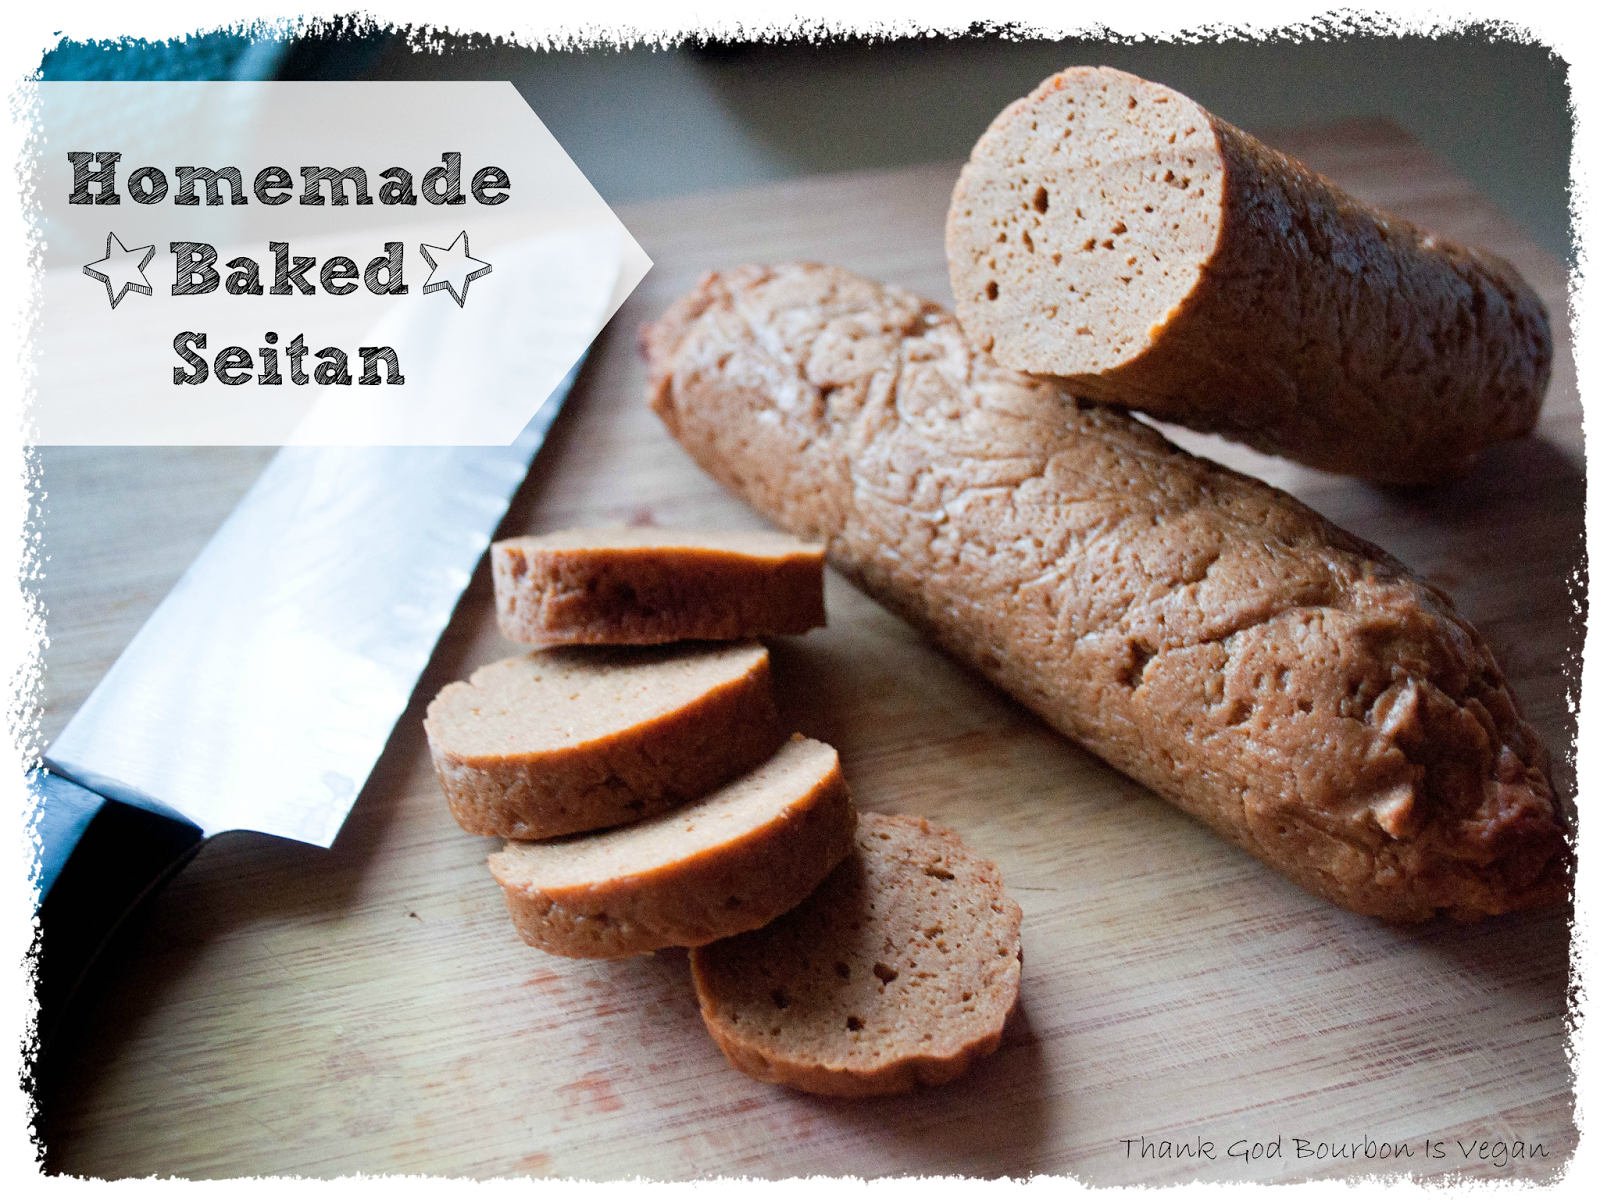
Homemade Baked Seitan
Makes: 6-8 servings
Time: 15 minutes active, 1 hour inactive
Ingredients
3 cups wheat gluten
1 cup nutritional yeast
2 teaspoons smoked paprika
2 teaspoons garlic powder
2 teaspoons onion powder
1 1/3 cup water
1/3 cup shoyu sauce
1/3 cup olive oil
1/4 cup vegan Worcestershire sauce (such as Annie's)
2 teaspoons liquid smoke
2 teaspoons smoked paprika
2 teaspoons garlic powder
2 teaspoons onion powder
1 1/3 cup water
1/3 cup shoyu sauce
1/3 cup olive oil
1/4 cup vegan Worcestershire sauce (such as Annie's)
2 teaspoons liquid smoke
Method
Preheat oven to 350F.
Combine the wheat gluten, nutritional yeast, and spices in a large bowl.
Combine the water, shoyu, olive oil, Worcestershire sauce and liquid smoke in a large measuring cup or bowl.
Add the wet mixture to the dry mixture and stir to combine until all the ingredients are incorporated into a wet dough. Dump the dough out onto a clean, flat surface and knead the dough for about 5 minutes, until the gluten is activated. You can tell when the gluten is activated because the dough will spring back to its original shape when pressed and will stretch before ripping when pulled.
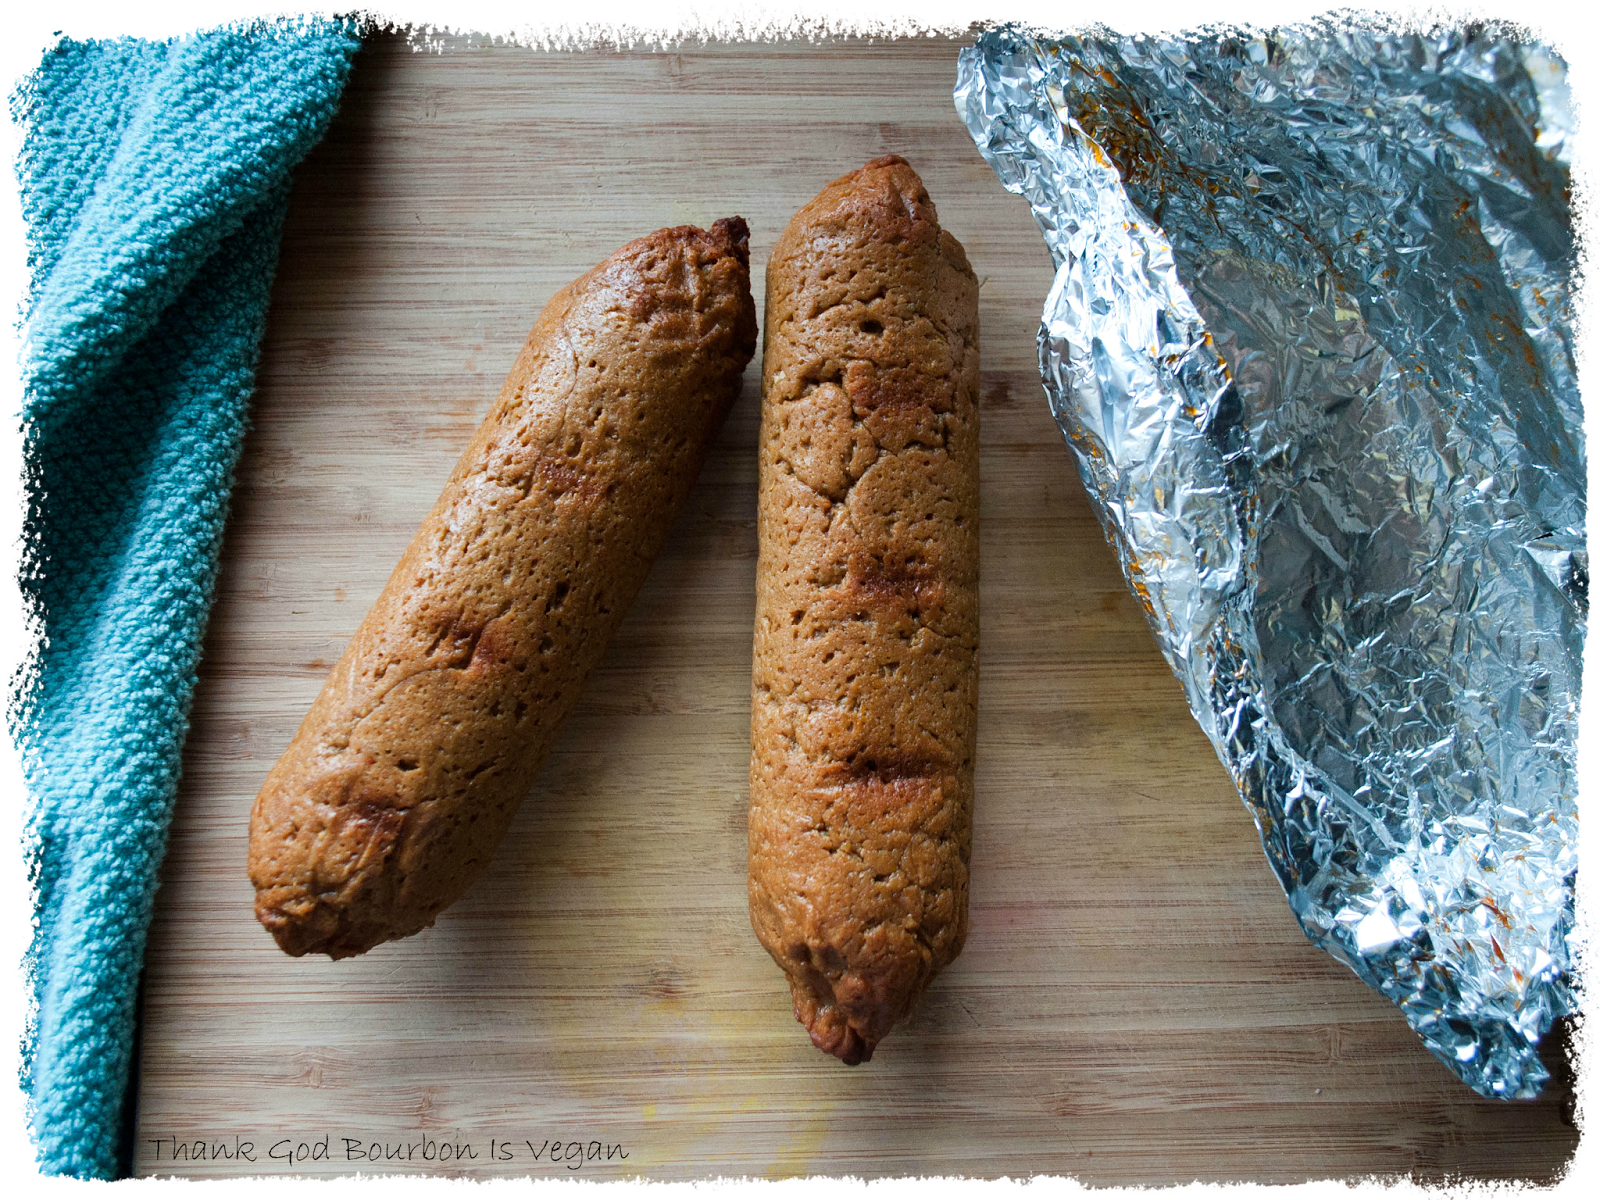
Knead the dough into a round ball, flatten slightly, and cut into four quarters. Roll each piece of dough roughly into a cylinder (it doesn't need to be perfect because the dough will fill the space in its foil wrapper and become a perfect cylinder anyways). Place each piece of dough on a sheet of foil, and roll the foil up like a candy wrapper, twisting at the ends (see below, instructions continue after picture).
Knead the dough into a round ball, flatten slightly, and cut into four quarters. Roll each piece of dough roughly into a cylinder (it doesn't need to be perfect because the dough will fill the space in its foil wrapper and become a perfect cylinder anyways). Place each piece of dough on a sheet of foil, and roll the foil up like a candy wrapper, twisting at the ends (see below, instructions continue after picture).
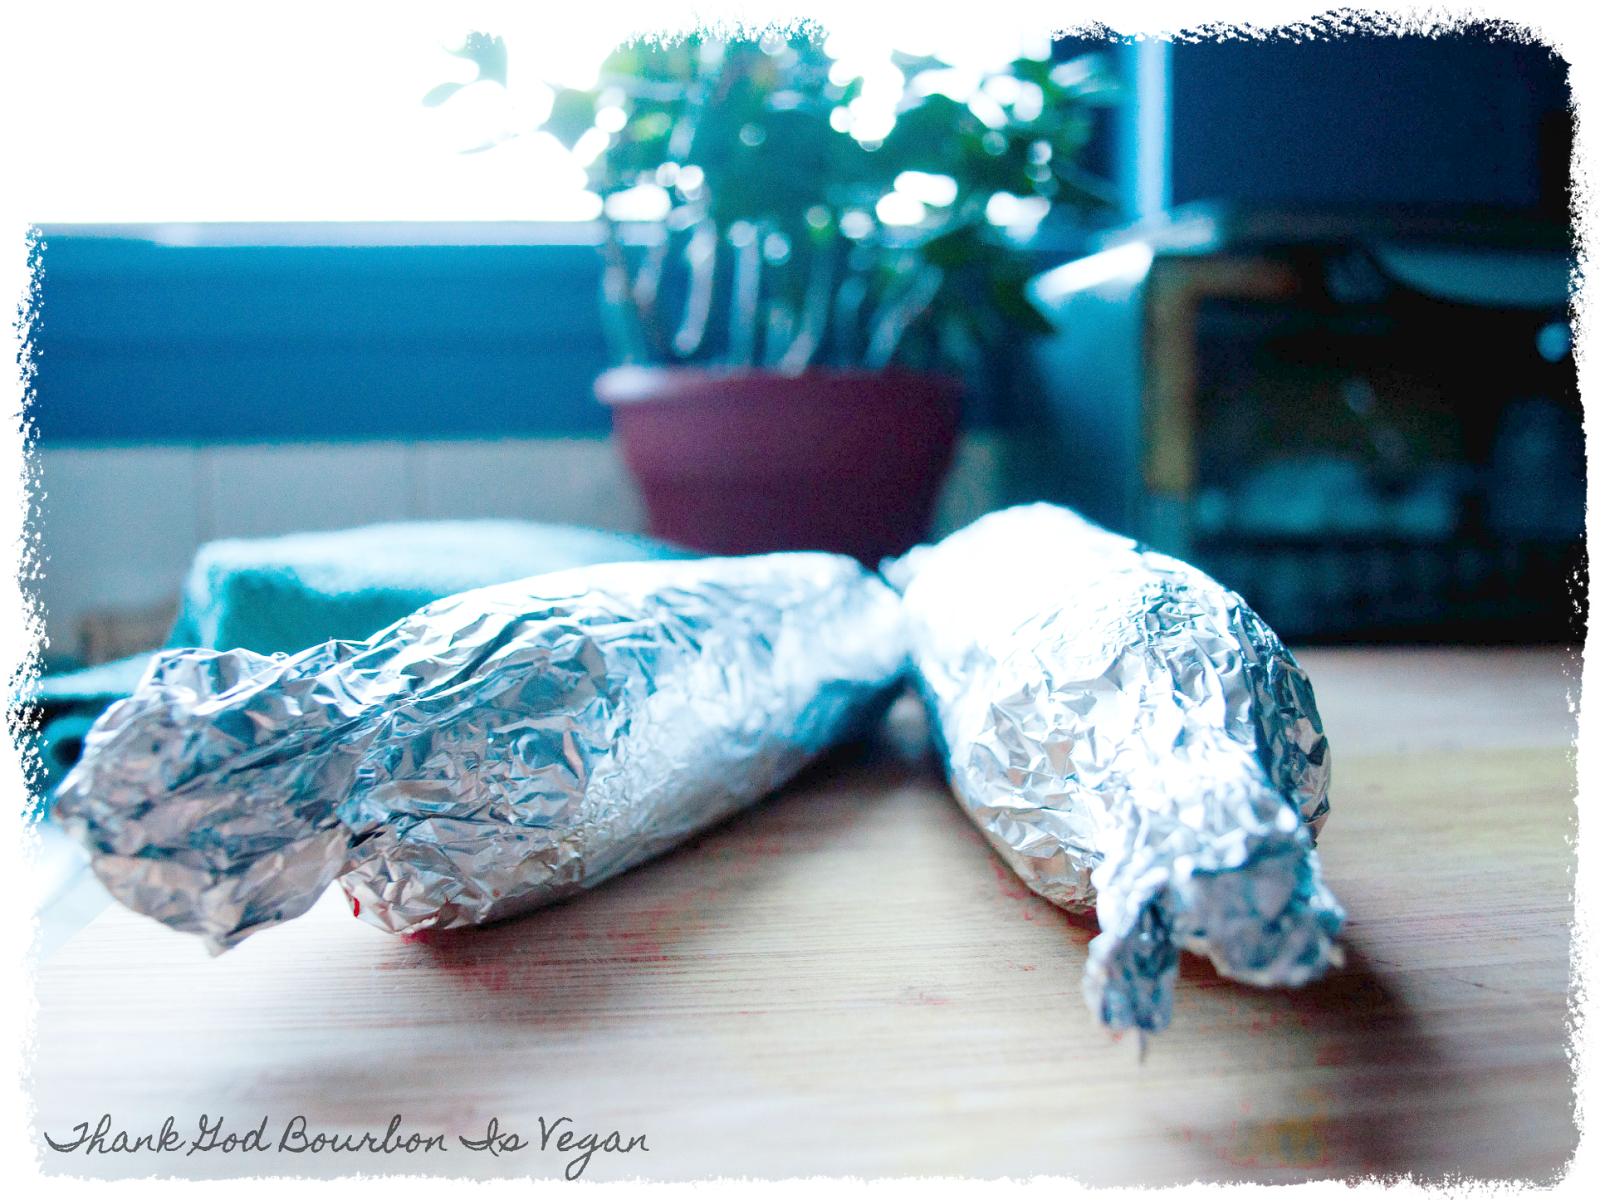
Place each wrapped seitan piece in the heated oven, you will not need to place on a baking sheet, just make sure that the seam is facing upwards. Bake for 30 minutes.
Turn each seitan piece so that the seam is facing down, and bake for another 30 minutes. The seitan should now feel very firm to the touch. Remove from the oven, cool, and unwrap. Your seitan is now ready to use in recipes!
Great recipe! Thanks!
ReplyDeleteGlad you liked it! :)
DeleteI am new to vegan eating so I am not so confident with my skills. I cut this recipe in half not know how it would turn out and it was chewy. Did I not cook it long enough maybe? Any tips would be appreciated. I thought baking would be better since I totally failed at boiling seitan last week! :) I baked it before and it turned out but I am not sure how to fix the chewy texture? Thank you.
ReplyDeleteHi Rob! I'm sorry that it didn't work out for you! When you say it was chewy, was it gummy or was it tough? If it was gummy, my guess is that it needed to cook longer. If it was tough, it might have been overcooked or perhaps the foil didn't keep enough of the moisture in. In general, I think that baked seitan is better (depending on the recipe you're using it in), but it is a little bit trickier than boiling it, since you have to bake it all the way through without having it become too dried out.
DeleteIt was chewy, like rubbery. The foil split open a little so maybe it let moisture out? I will give it another try this week and see how it goes. Thank you. Oh and that was my message below as well but our internet cut out and I didn't think it sent so I did it again. Sorry. No need to reply to that one too!
DeleteYeah, sometimes if the foil splits open it will be tough where it split. Another thing is that perhaps your oven is hotter than mine and it is becoming overcooked. You might try checking it at 10 minute intervals after the half hour mark to see how it is progressing. It should be firm and no longer squishy, and the center shouldn't be doughy at all. Once its reached that point, you don't need to continue cooking for the entire hour. I hope that helps, but let me know if you continue having problems!
DeleteI tried making this tonight and it was chewy. Did I not cook it long enough. I am new to vegan eating so I am not sure how to fix it. Any tips would be appreciated! Loved the flavor but the texture seemed off? Thanks.
ReplyDeleteAdding beans can help with the texture. Check out Mary's Test Kitchen video recipe for Beefy Beefless Seitan
ReplyDeleteHi, I made this today. I'm allergic to soy, so I just subbed water and a cube of veggie bouillon. The flavor is really good. I set the oven to 350 and cooked half an hour on each side, but the outside of the seitan is really tough. I've never made baked seitan before, so I wondered if you think I should cook it for less time or set my oven temp lower. Thanks!
ReplyDeleteHi, I also started out boiling my seitan, it does hold lots more moisture,but I've found that doesnt matter when it comes to using it in several recipes which are moist anyways... I've also started in the last three months baking it, I've found that if I replace the water with either soy or almond milk, and I use Bragg's aminos with liquid smoke it makes a softer dough and the texture is very good....
ReplyDeleteI ran your recipe with no changes, and the results were wonderful. Baking is a far less involved way to make seitan, and needless to say I'm sold. Wonderful tender (slightly chewy) mouth-feel, good flavor, and a nice subtle exterior texture differentiation.
ReplyDeleteThe loaves are quite well seasoned though. I'm curious about what changes are best to make something without so much intrinsic flavor for use in dishes where the flavor might not mix so well with the dish. I'm hesitant to change the wet ingredients, but I'm also not certain how much the yeast changes the texture over flour in the recipe you referenced.
I figured I might as well note a few things for those who haven't made it yet:
• The garlic and olive oil make this smell a bit like baking pizza when it's in the oven. It really doesn't taste that way in the end, but it's certainly the smell I get while it's in the oven.
• The flavor and texture in the end reminds me of pepperoni. I don't think there is enough fat to use it as a direct replacement, but it's worth exploring for those who bake pizza at home.
• I really don't taste much in the final product from the soy sauce or Worcestershire sauce. No doubt the salt, vinegar, and soy umami have an impact, but the typical flavors I expect from each sauce aren't distinguishable in the final product. The spices dominate the flavor.